
Hello!
In this post I want to talk to you about why architectural photography is fun to do and give you tips on how to get better, if you just started out, or if you want to try something new.
Just a disclaimer from the start.
I am not a professional photographer by any means, but I am an amateur, who loves to take photographs, just like you (else you would not have come here I guess).
And I made a mistake in my Aperture for these shots, because I went with a pretty large Aperture and should have gone at around F-11, to get everything nice in focus, so a good lesson learned for myself :).
The first ever image recorded by a camera was actually an architectural photograph, and this was way back in 1827.
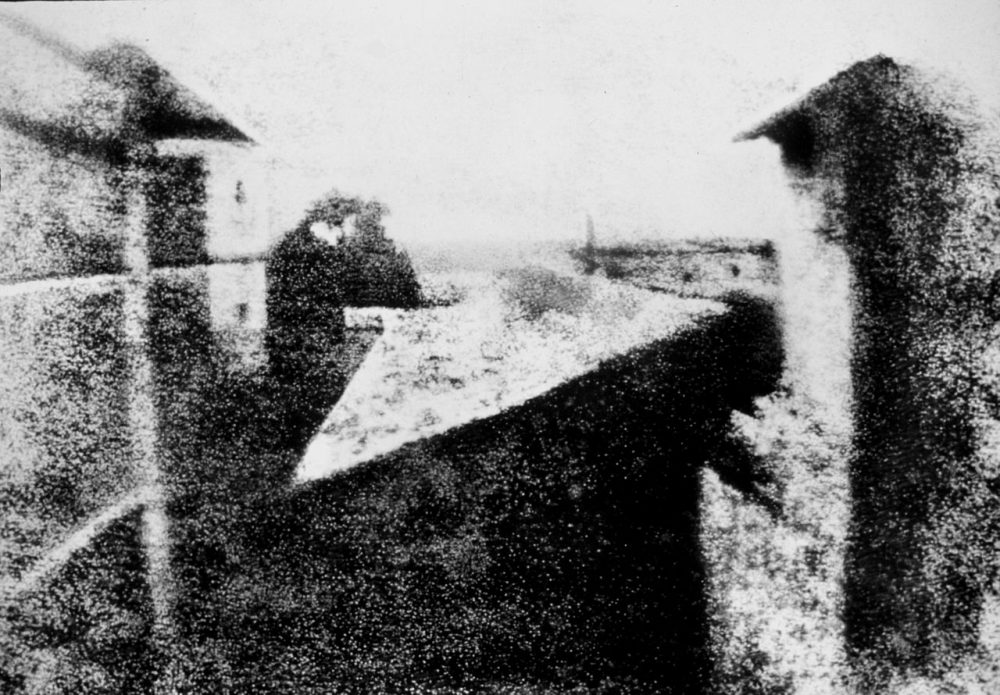
The photograph was shot by Nicéphore Niépce, with the use of a camera obscura, with a plate coated with Bitumen of Judea.
Anyway, let me first tell you what interests me in Architecture, because I have never studied architecture. So this is a layman’s view on it.
My main interest is the look and design of buildings and bridges. The way materials are used to construct something, and how it interacts, or stands stands out in a city for example.
I also love the way how light and shadows can affect the look of a building, and how reflections in windows can give you a unique view of another structure.
Below is a nice example of the building “De Rotterdam”, with the Erasmus bridge reflected in the windows of the building.
So my first tip is look for reflections in buildings and see how this can work to your advantage.
My settings for this shot were 1/1000 sec, ISO 320, F 5, at 54 mm focal length (My camera was still on shutter speed priority from a previous image I shot).
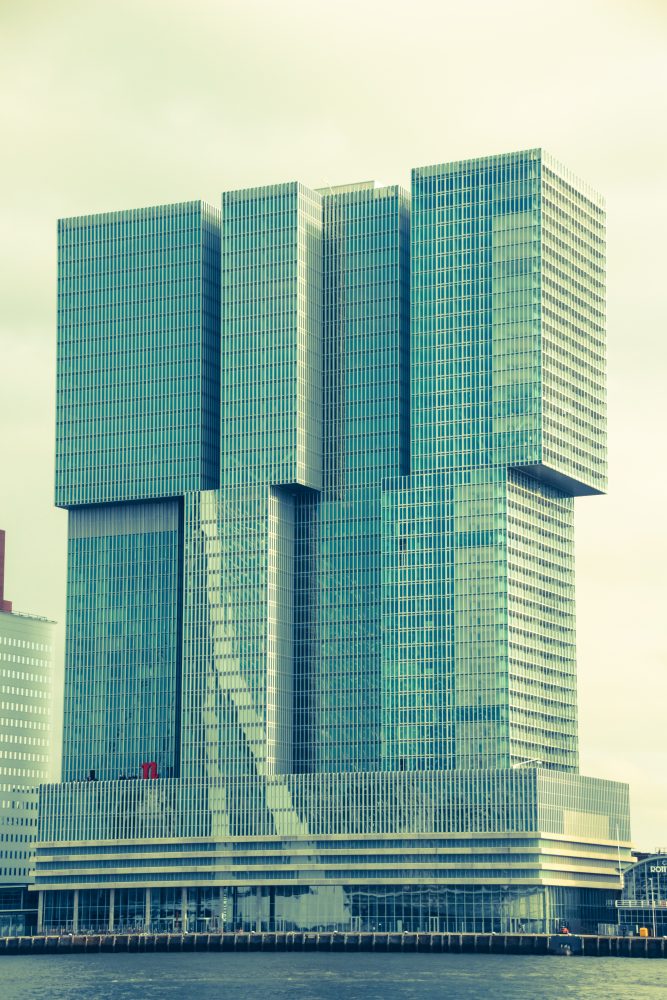
De Rotterdam, is designed by Rem Koolhaas from The Office for Metropolitan Architecture (OMA), and was opened in 2013, although the design was from 1998.
It measures around 150 meters high and it has 44 floors. The total floor area covers around 160.000 square meters, which makes this the largest building in the Netherlands.
Because I really think this is such an amazing building, I decided to come back to it with my new camera (More on this in a later post), and get some more shots in from different angles.
A building like this is great for architectural photography, because there are so many ways to take a great shot from it.
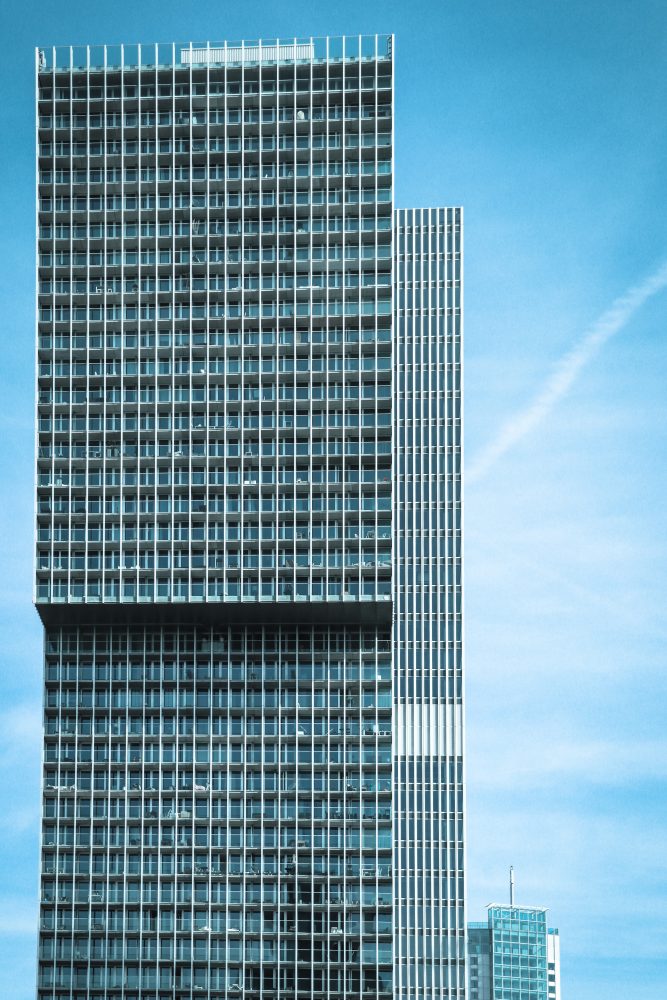
The next shot was the first one I took after I had parked my car, and I was looking at the building from the side. You can see just how massive it is.
My settings for this shot were 1/500 sec, ISO 100 F 5.6, at 52 mm focal length.
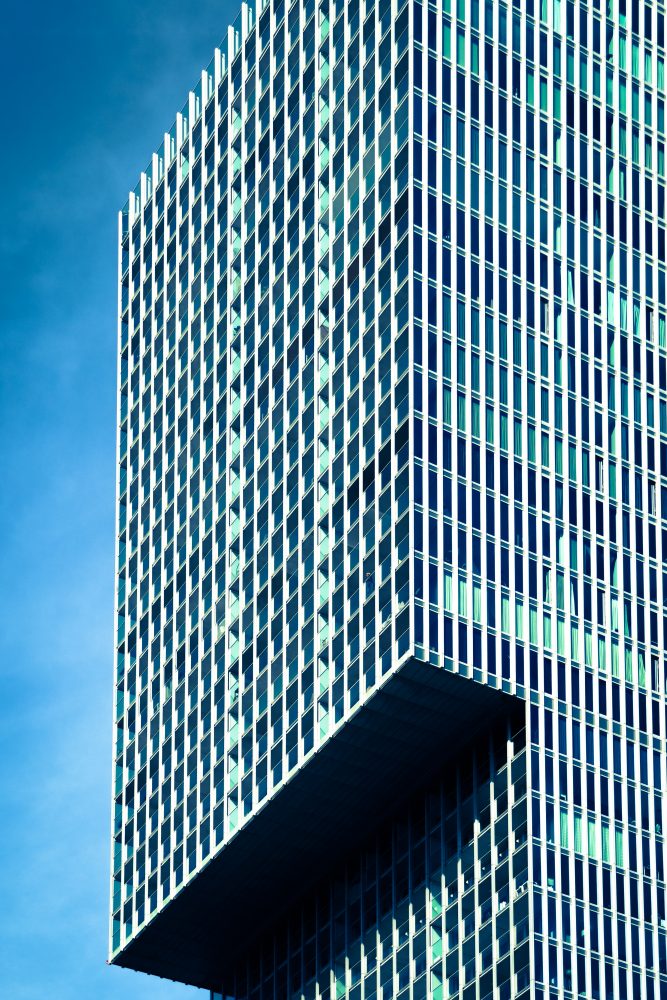
At that moment I decided that I needed to explore this amazing looking building some more to get some different shots from different angles. So I started to walk around the building looking for a nice shot, and I came up with the next photograph, which has some really nice vertical and diagonal lines.
My second tip is look for nice horizontal, vertical and diagonal lines.
Imagine working or living at the floor with nothing beneath it…. Must feel really weird in my honest opinion.
My settings for this shot were 1/800 sec, ISO 100 F 5.6, at 56 mm focal length.
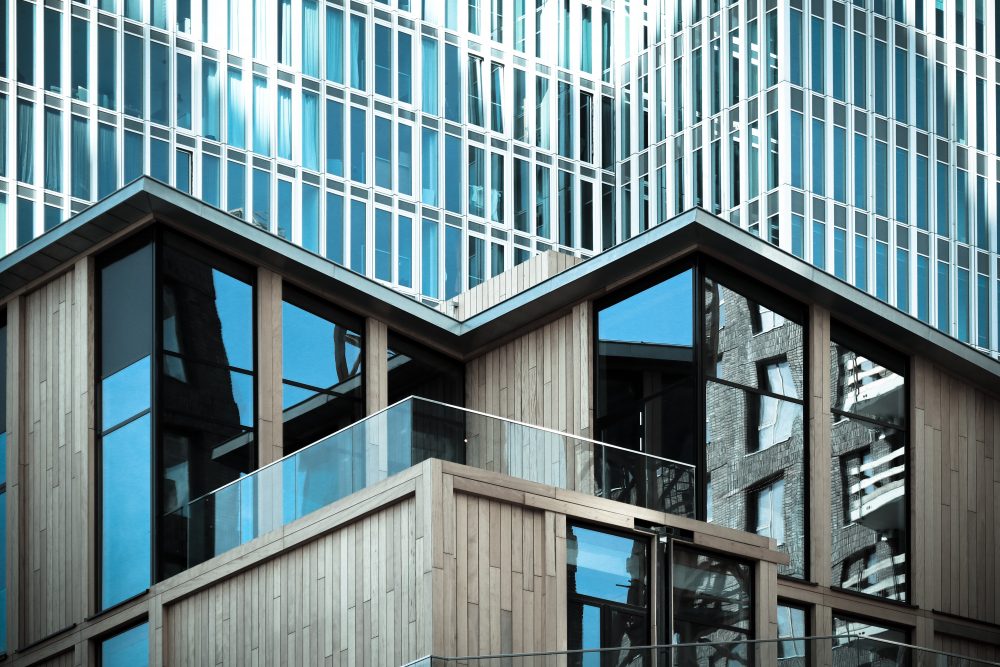
I still had the feeling I could get some more shots from the building so I kept on walking, until I saw a building in front of “De Rotterdam”, which has some nice reflecting windows and diagonal lines. The wood paneling gives it just that bit extra I believe.
My settings for this shot were 1/200 sec, ISO 100 F 6.3, at 95 mm focal length.
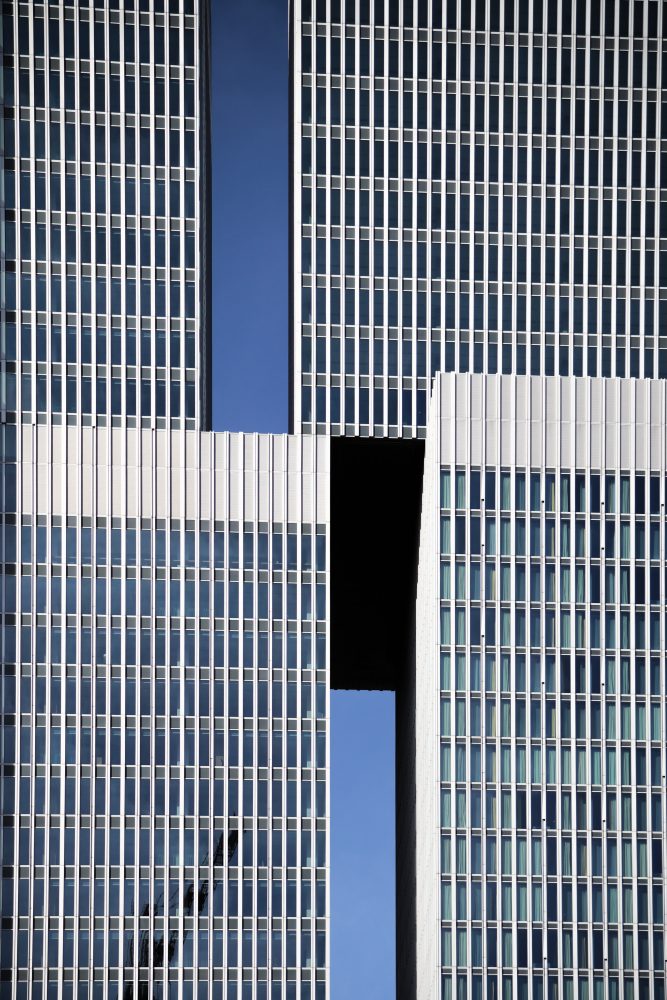
The last photograph from “De Rotterdam”, I took when I came to the front of the building, which gives the next view.
It looks like random blocks stacked up onto each other like this.
My settings for this shot were 1/1000 sec, ISO 100 F 5.6 at 52 mm focal length.
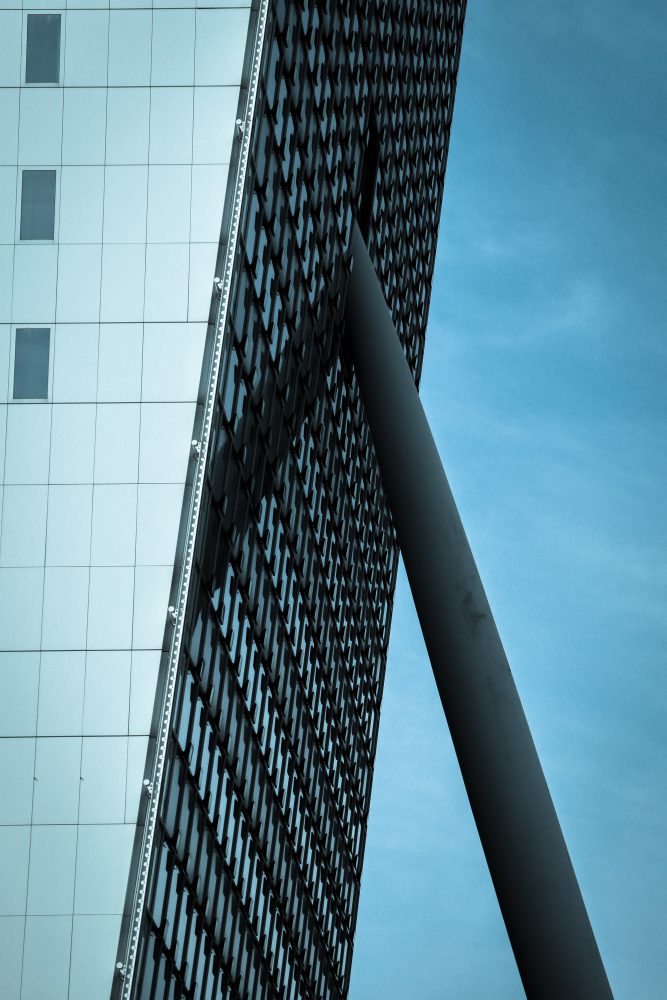
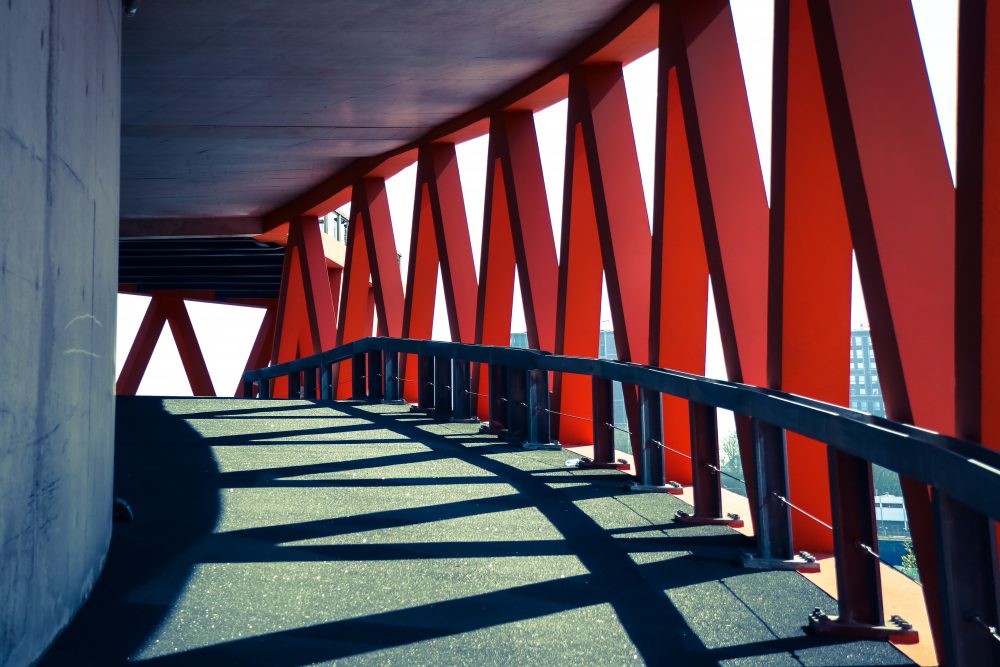
I continued to walk around the building in a large loop, when I saw the KPN Ventures building which is a building which seems to lean forward, and is supported by a large strut.
Its a really nice piece of Architecture and engineering in my opinion.
For the next shot, I wanted to show the connection between the strut and the actual building itself, and this is how it turned out.
I could have gone wide in this shot, but decided against it.
My settings for this shot were 1/800 sec, ISO 100 F 6.3 at 84 mm focal length.
So my third tip is to try to focus on parts of a building that really stand out in your view and try to get a nice photograph of it.
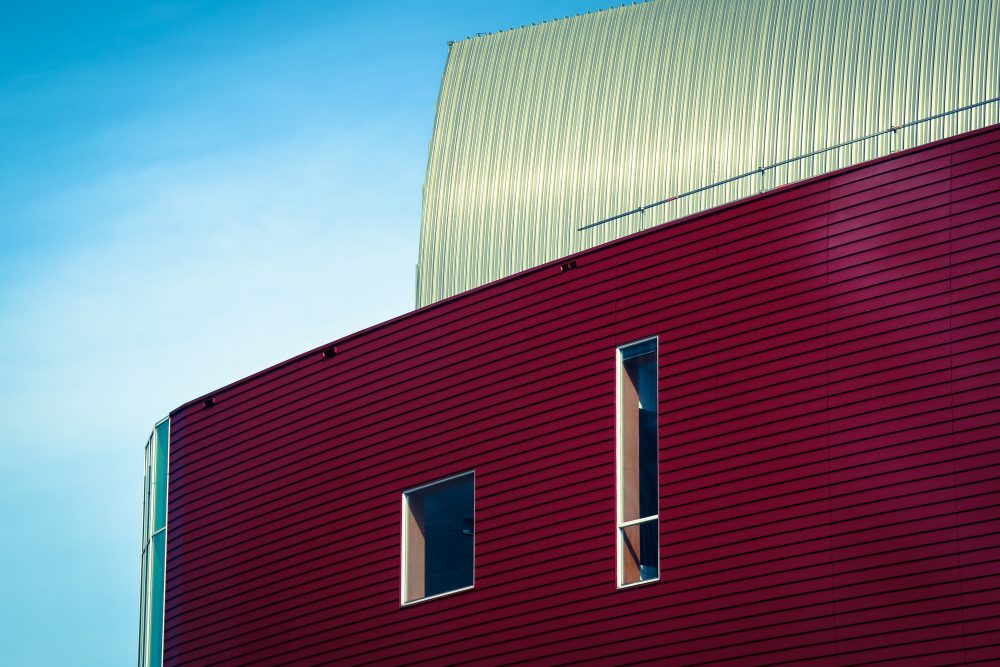
At this point I came across the building the “Nieuwe Luxor Theater”, and I got some really nice shots in my opinion.
The first shot is the curvy roof line of the building, with some upper structure curving to the right, and it really flows well. I also love the cotrasting colors.
So again I decided to focus on some detail of the building, instead of going wide.
My settings for this shot were 1/1000 sec, ISO 100 F 6.3 at 64 mm focal length.
Architectural photography is also about light (In this case the sun) and shadows and getting that to work in your shot. So that is my fourth tip. And in the next photograph you can see how well that works out.
This is the entrance to the parking space from the “Nieuwe Luxor Theater”.
My settings for this shot were 1/500 sec, ISO 100 F 5.6 at 50 mm focal length.
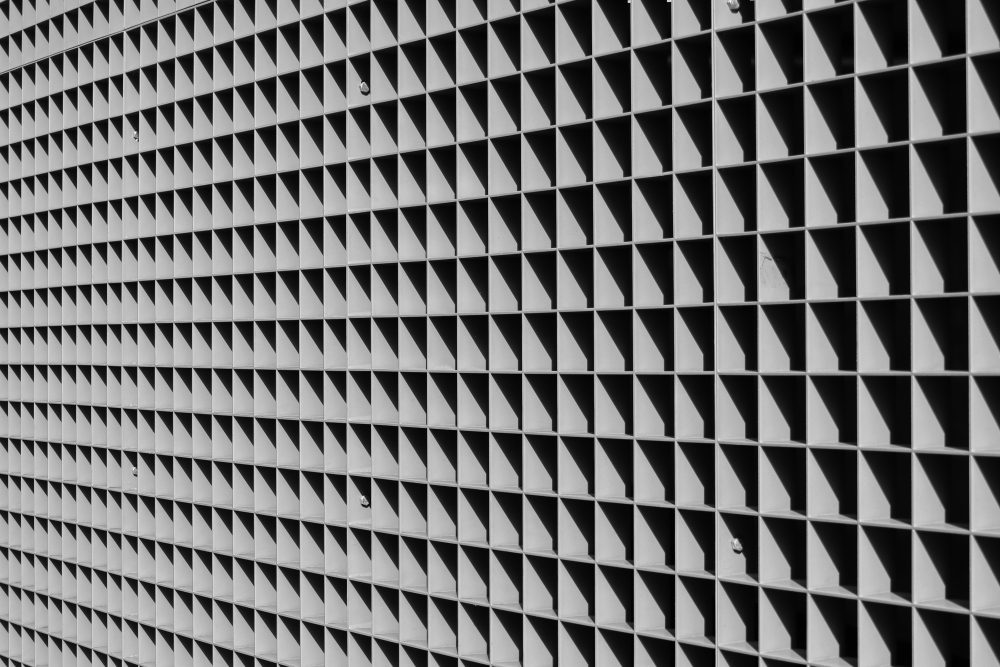
For the next photograph I decided to solely focus on light and shadow, and I saw this grating wall next to a different parking lot entrance and it really is a nice example of light and shadow.
I love the triangle shapes the shadows cast.
My settings for this shot were 1/640 sec, ISO 100 F 5 at 41mm focal length.
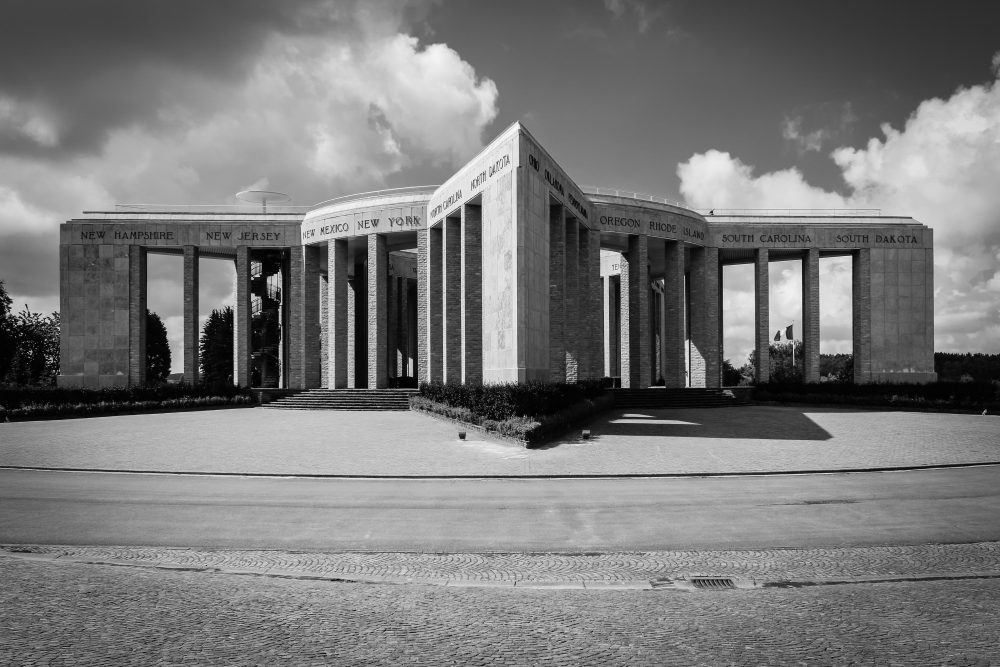
The last tip I want to share with you, is to create symmetry in your image, and below is a nice example of that.
I took this photograph a few years ago when I was traveling through Belgium, France and Luxembourg for a nice holiday filled with lots of amazing places, and cities.
Its the Mardasson Memorial, located near Bastogne in the Luxembourg province of Belgium.
My settings for this shot were 1/250 sec, ISO 100 F 10, at 18 mm focal length.
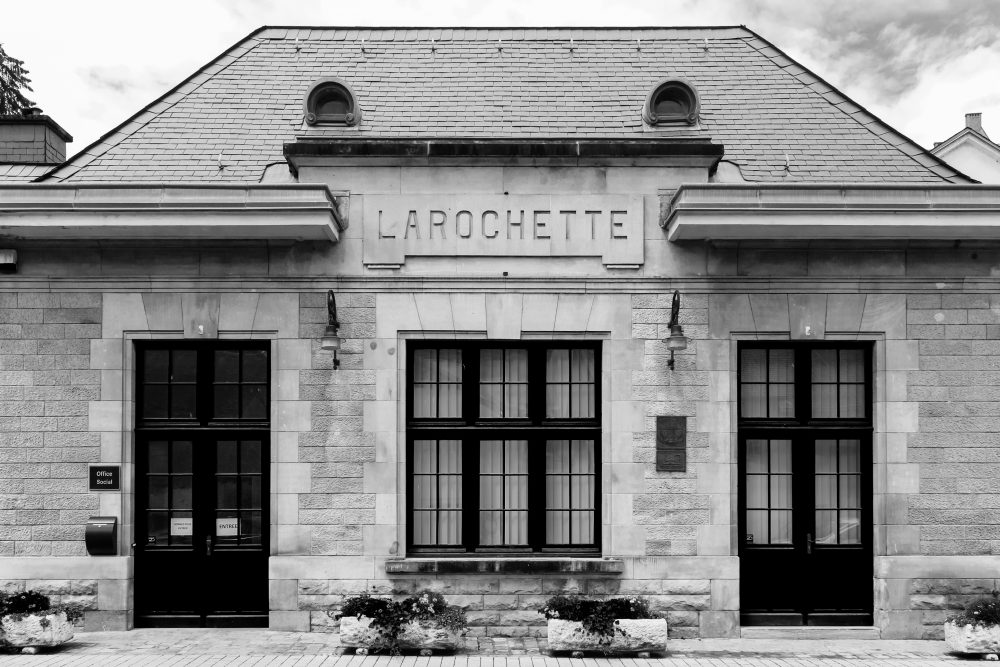
The last image I want to share is also a great example of symmetry, and this was taken that same holiday in Larochette, Luxembourg.
Its the social office building, and the photograph is really nicely balanced.
My settings for this shot were 1/200 sec, ISO 100 F 8, at 18 mm focal length.
Feel free to check out by post on photographing bridges if you want to get some insight in that.
I hope you liked this post, and feel free to leave a nice comment at the bottom, or share this with your friends.
I also hope that I might have given you some good pointers and ideas for you to get better at Architectural photography if you just started out.
If you want to share some pointers with me, feel free to leave a comment.
Just remember that this in no way intended for the more advanced architectural photographers, so if you want to hate this post, you are welcome to.
Kind regards,
J.
Pingback: Why I got a Canon EOS M5 mirrorless camera, and why I am glad I did.